Expenses are costs associated with a particular release and typically cover things like mastering fees, remix fees, artwork or promotional costs etc. For every release, you should input the associated expenses so these can be factored in when generating licensor statements.
Within RoyaltyWorx, these expenses are added to the related Single, EP or Album in our system and the expenses are then deducted from the sales. The percentage of the expenses (or costs) that will be removed from the sales total will be set when you create the Contract In for the release.
HOW TO ADD EXPENSES TO YOUR RELEASE
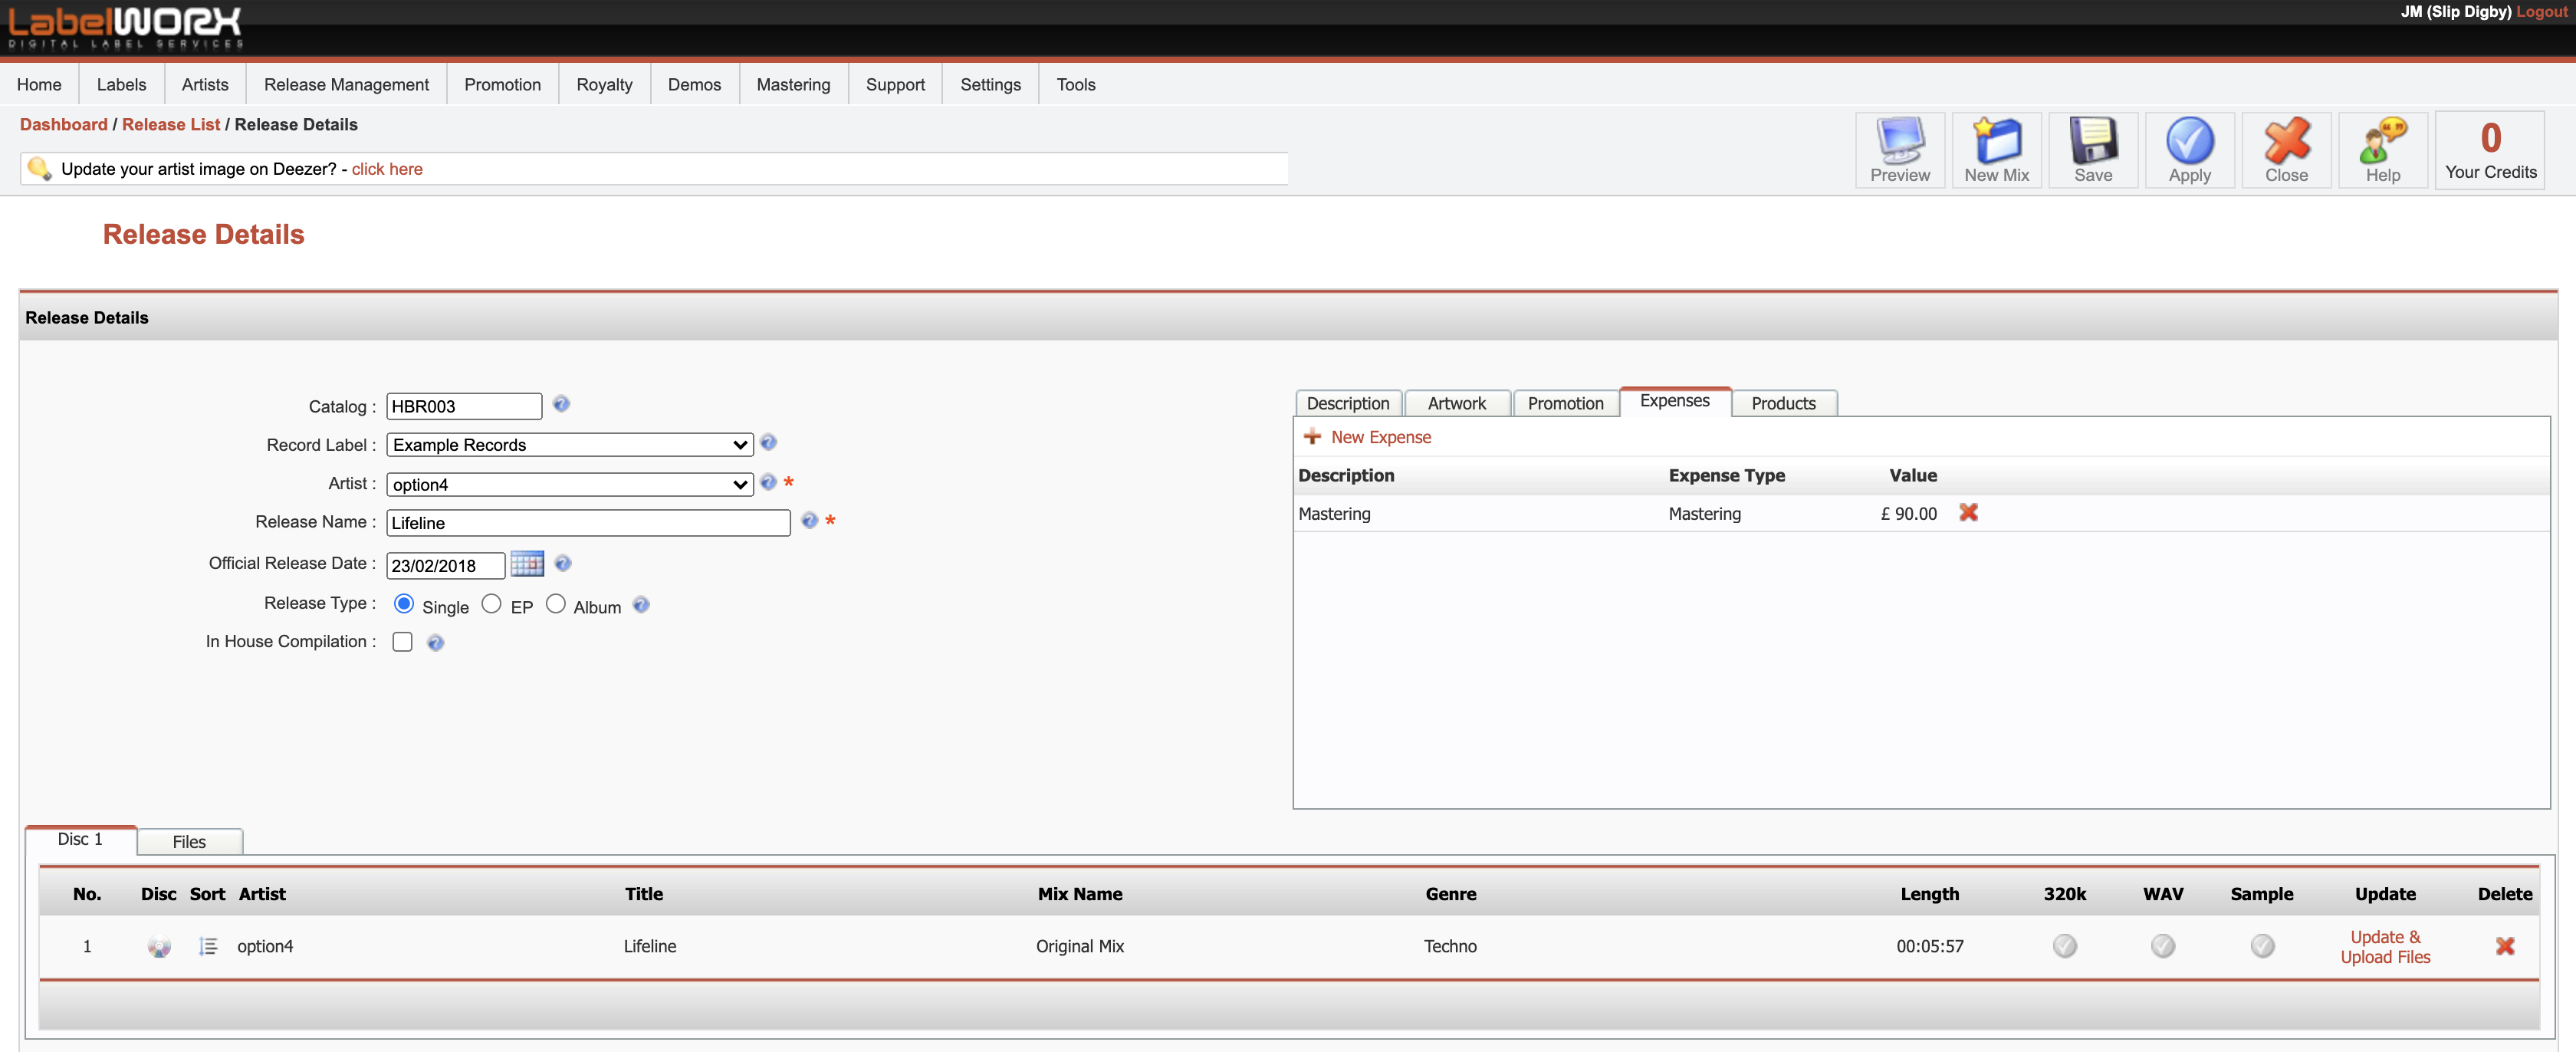
Expenses are added to releases through the Release Details page. Go to Release Management from the Top Menu and select Release List. Remember to check for any filters applied here and ensure you can see all releases you need.
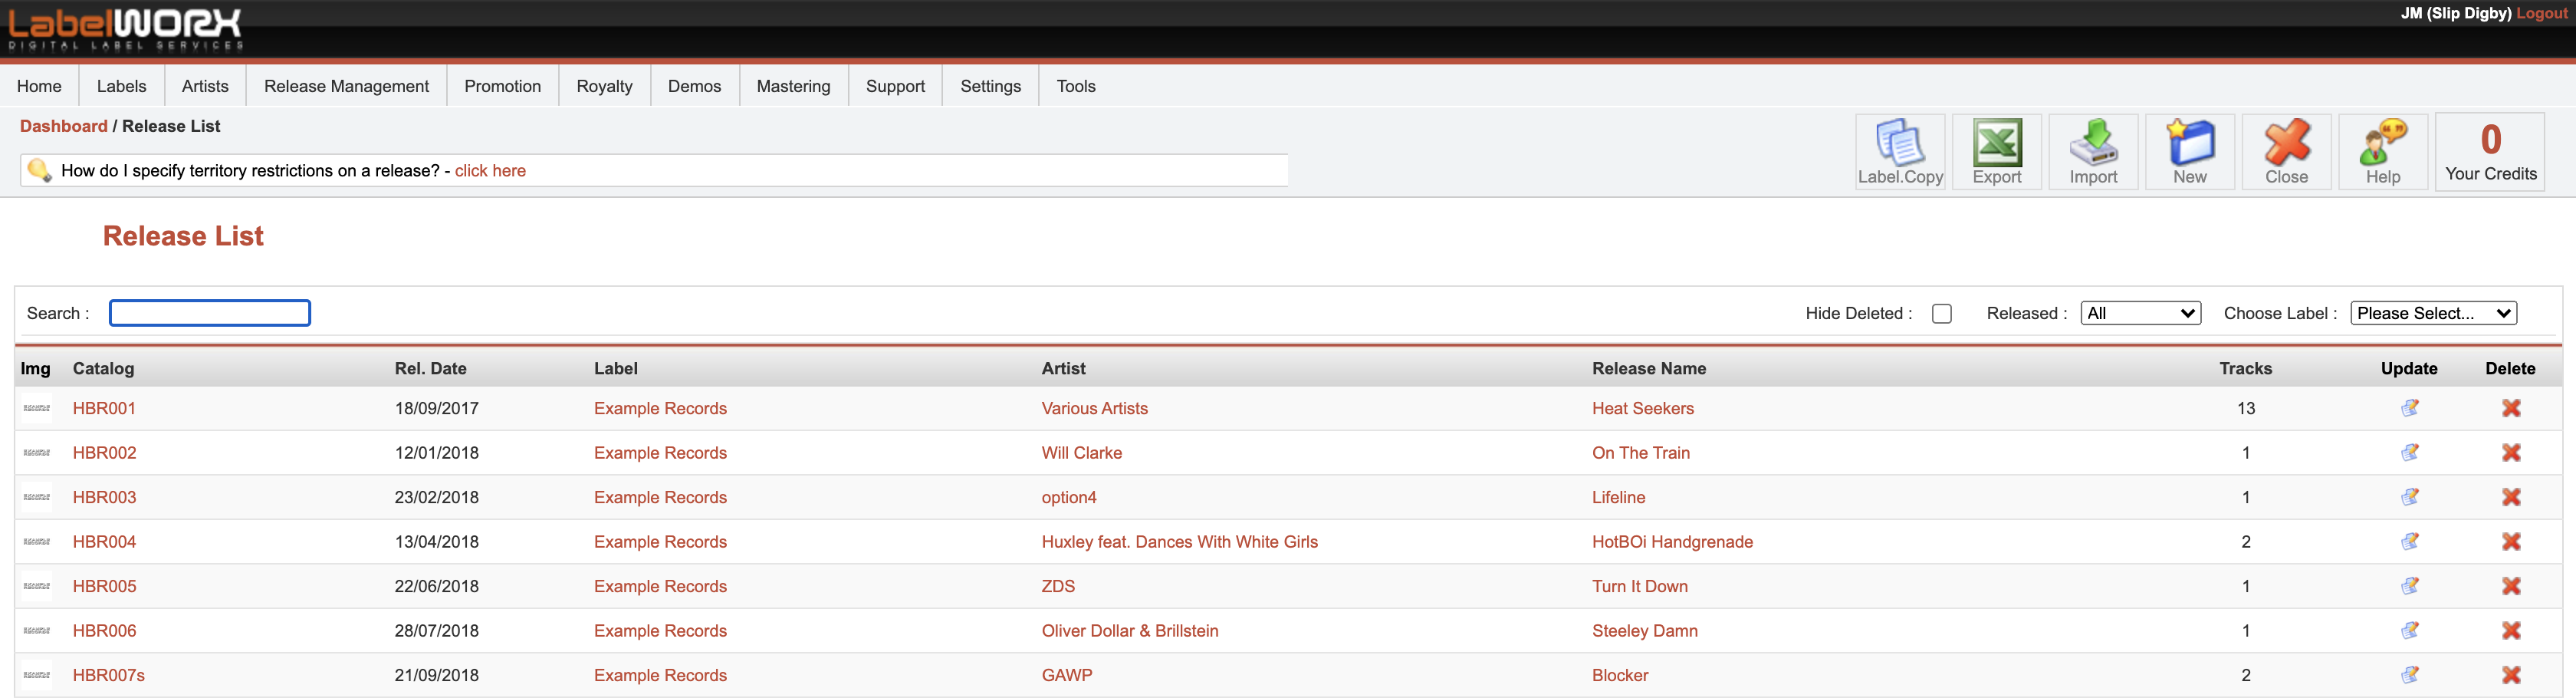
Click on the release you wish to add the Expense. You should then see the Release Details Page. On the right-hand side, select the Expenses tab.
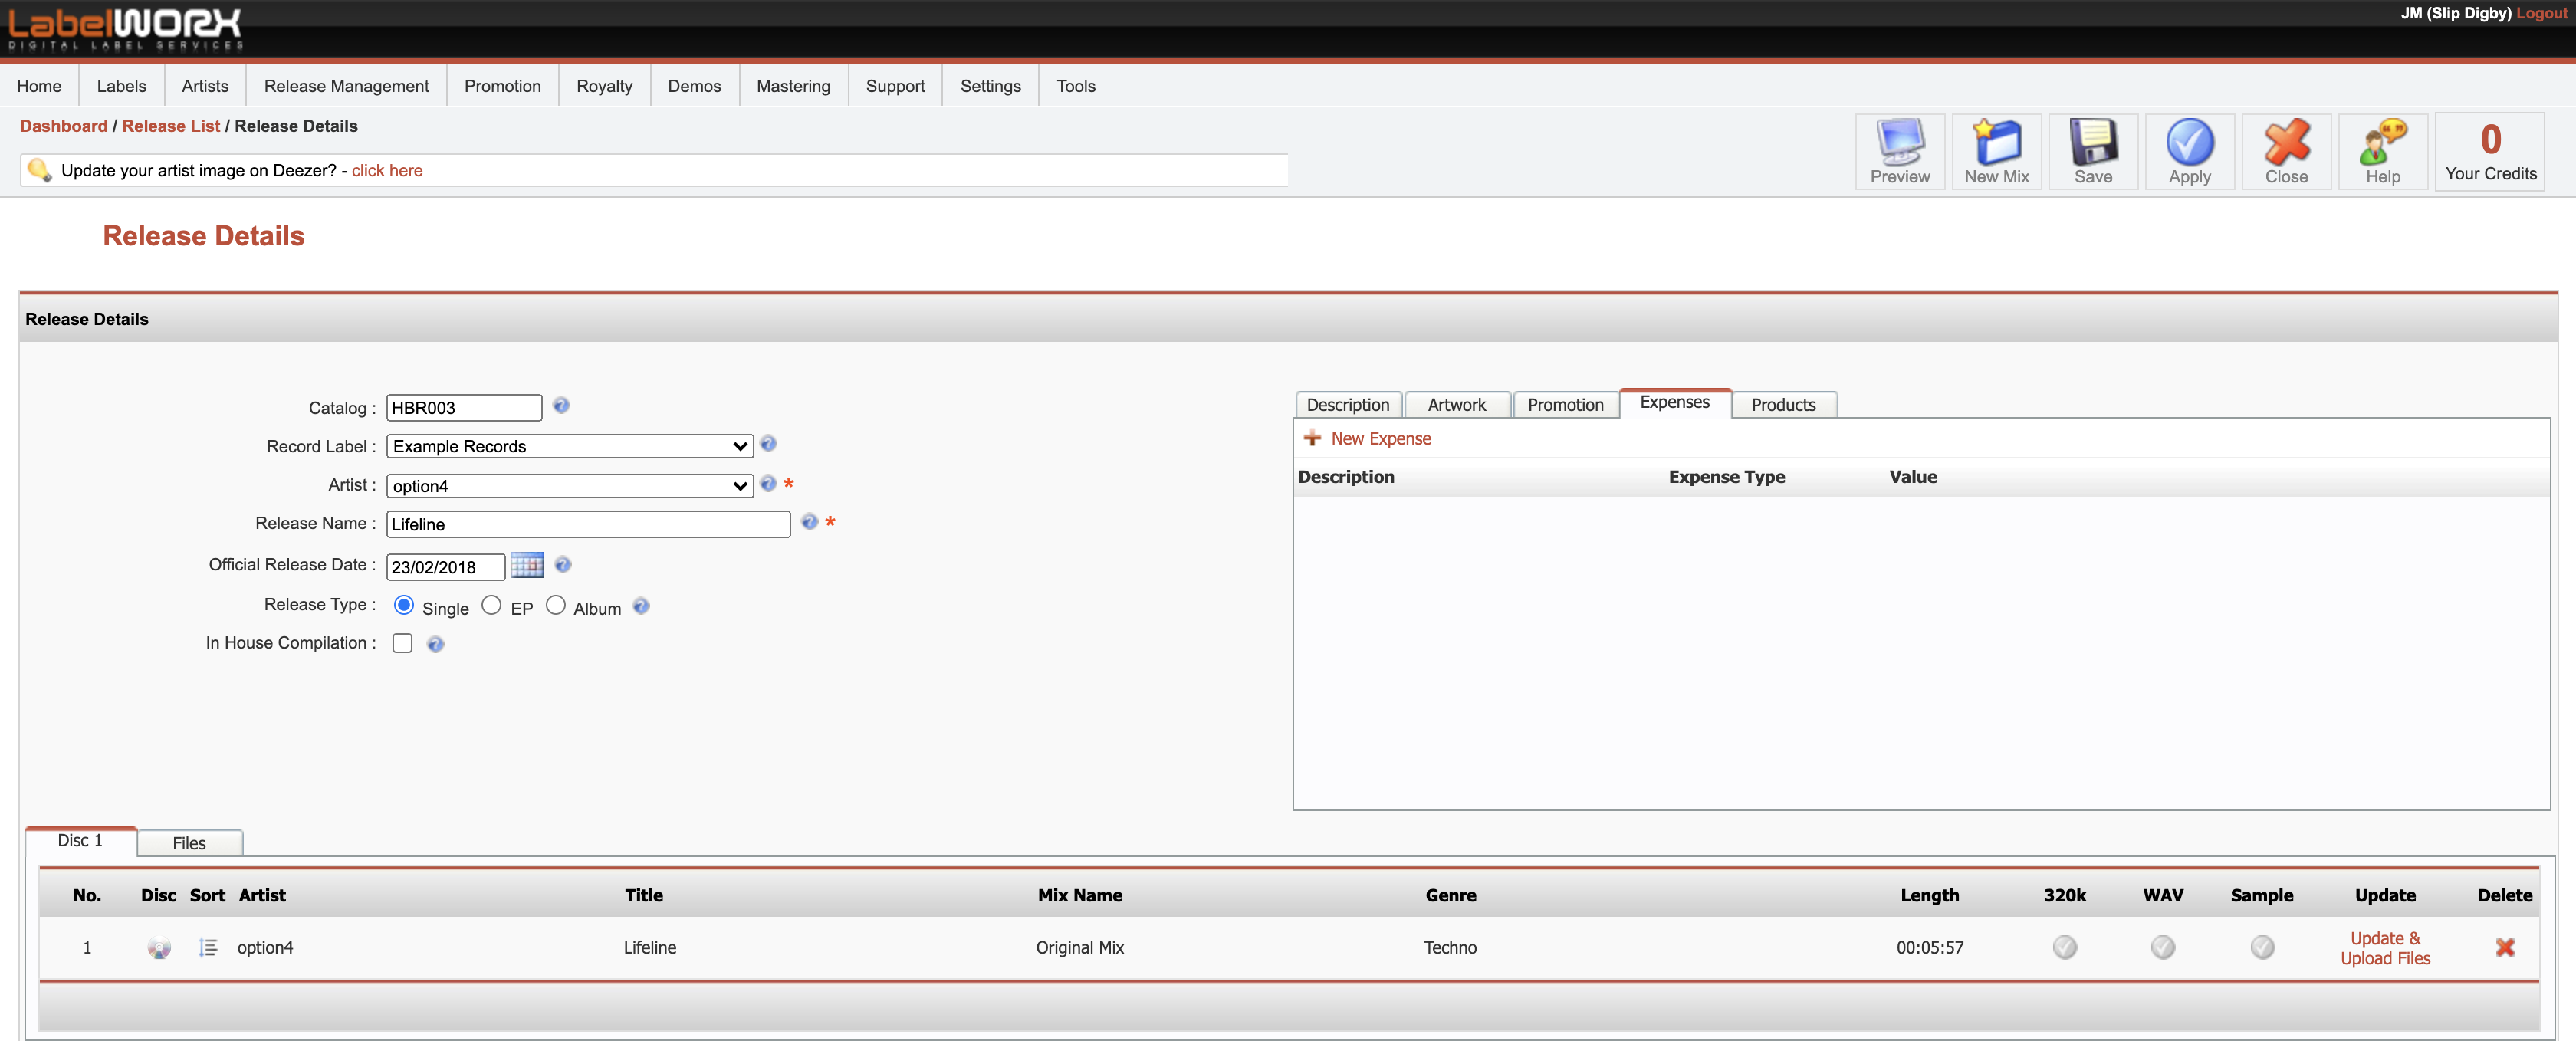
Click on New Expense and you should then see a pop-up window allowing you to enter the relevant details. Please see the below guide on what to enter here:
- Description - Enter a short description of the expense. This will appear on the Licensors statement.
- Date - Specify the date that the expense occurred
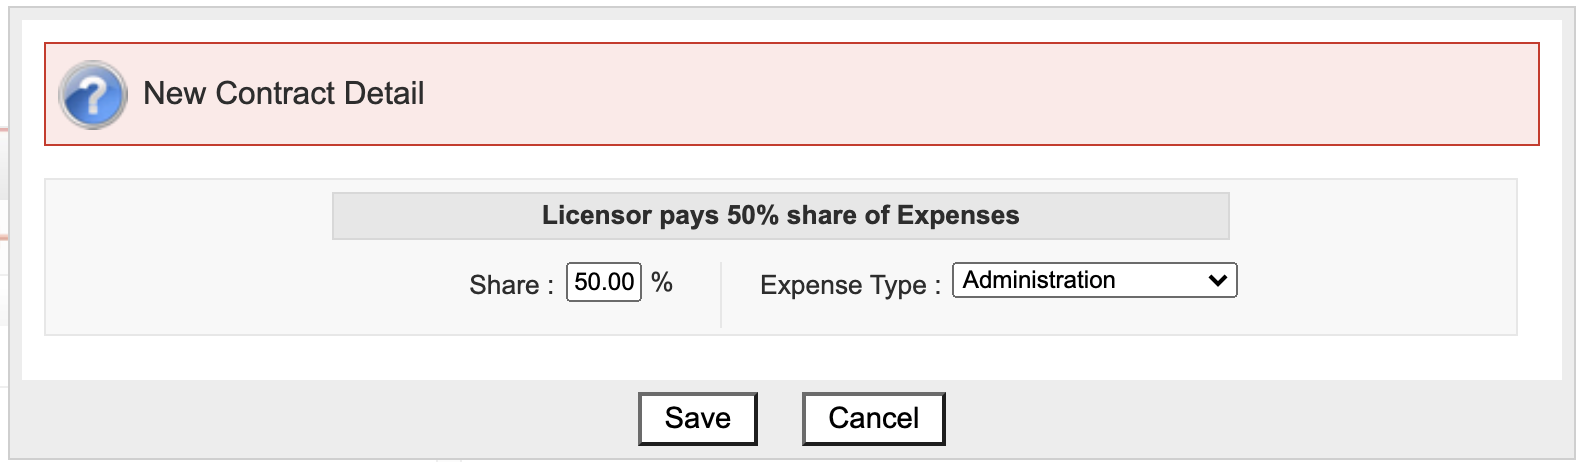
- Expense Type - Select the relevant option from the list, this is important as you can specify different rates for different expense types on the Contract In
- Accounting Track - This specifies whether the expense is for the full release or just 1 track. If you select a specific track, the system will account that expense to statements where that specific track is accountable only. If you select "Whole Release", the expense will be proportionately accounted across all tracks on that release.
- Item Value - Enter the cost of the specific expense
- Quantity - Select the quantity of this expense
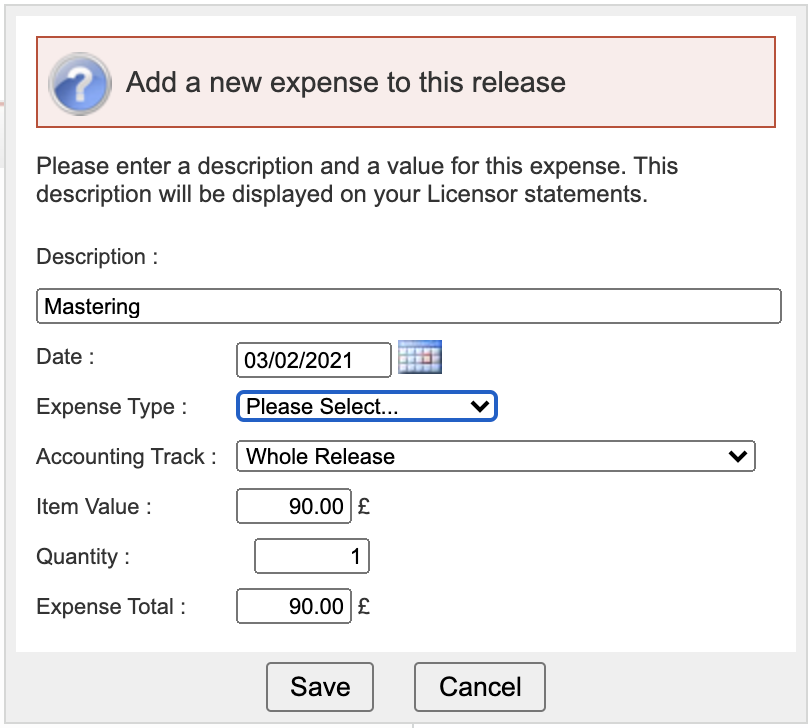

The Expenses Total should be calculated automatically using the data you entered for Item Value and Quantity. Check the Expense Total is correct before clicking Save.
You will now see that the expense has been added to your release/track and that will now be included in any calculation on this release.
IMPORTANT - Once a statement has been generated for this release, the Expense will become “Locked” preventing any further edits.
HOW TO SET DEFAULT EXPENSES
From the Label Worx Dashboard, go to Settings located within the top menu. Then, select the Royalty Worx Settings tab. In the section at the bottom, select the Default Expenses tab.
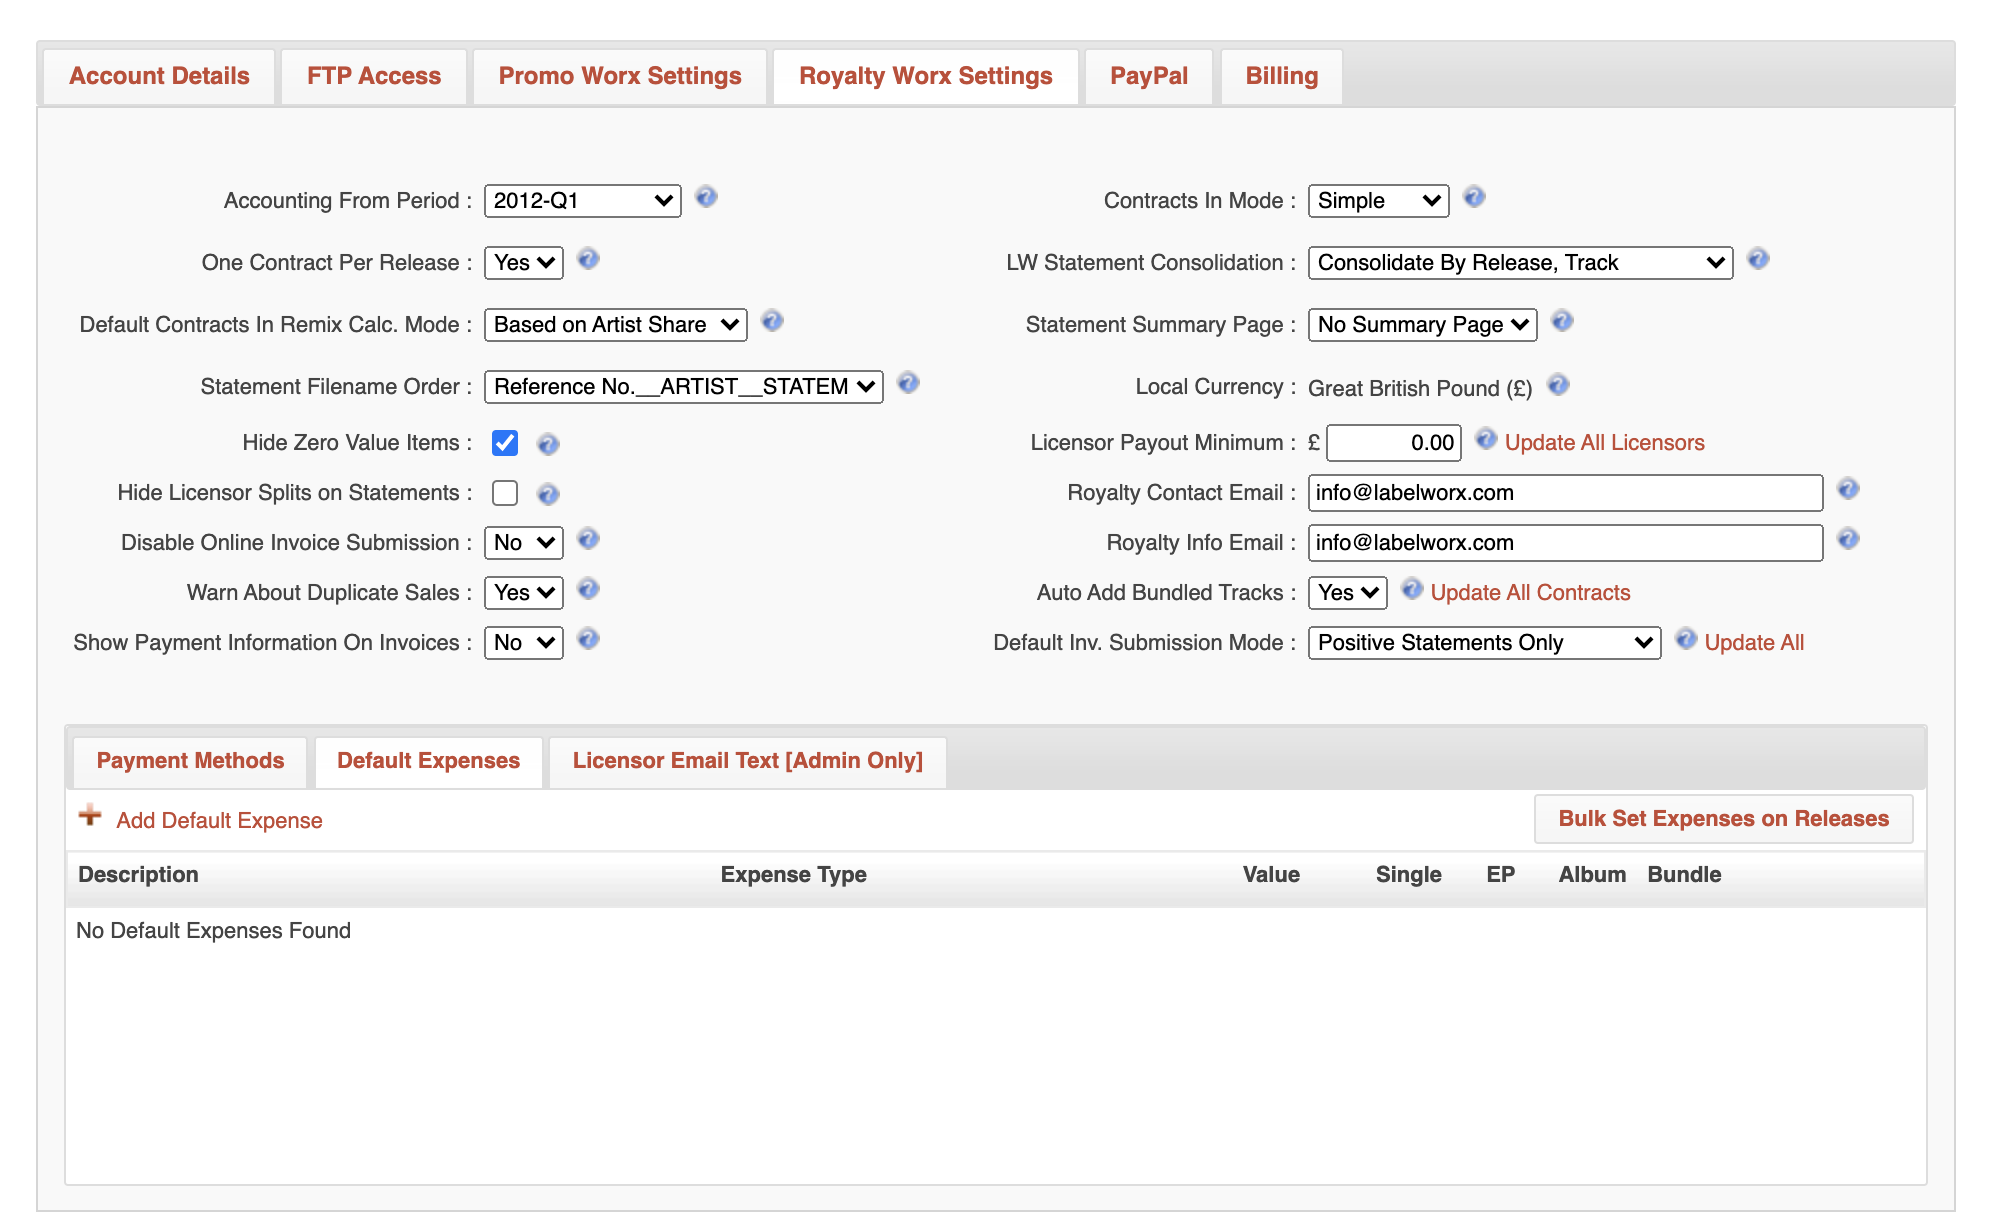
Click the Add Default Expense button and you should see the pop-up window appear. Here, you can enter the relevant information for your default expense.
You can give the expense a Description, select an Expense Type, the Item Value along with the Quantity. The expense Total will then be automatically created using that information.
The final step is to select which Release Type this expense applies to, Single, EP, Album or Bundle (compilation) before clicking Save.

Repeat this process for all the default expenses you need to add.
Any new releases you create from this point on will contain these expenses automatically.
If you want to apply default expenses to all existing releases, you just need to click the button on the Default Expenses tab called Bulk Set Expenses On Releases

HOW TO ADD EXPENSE TYPES
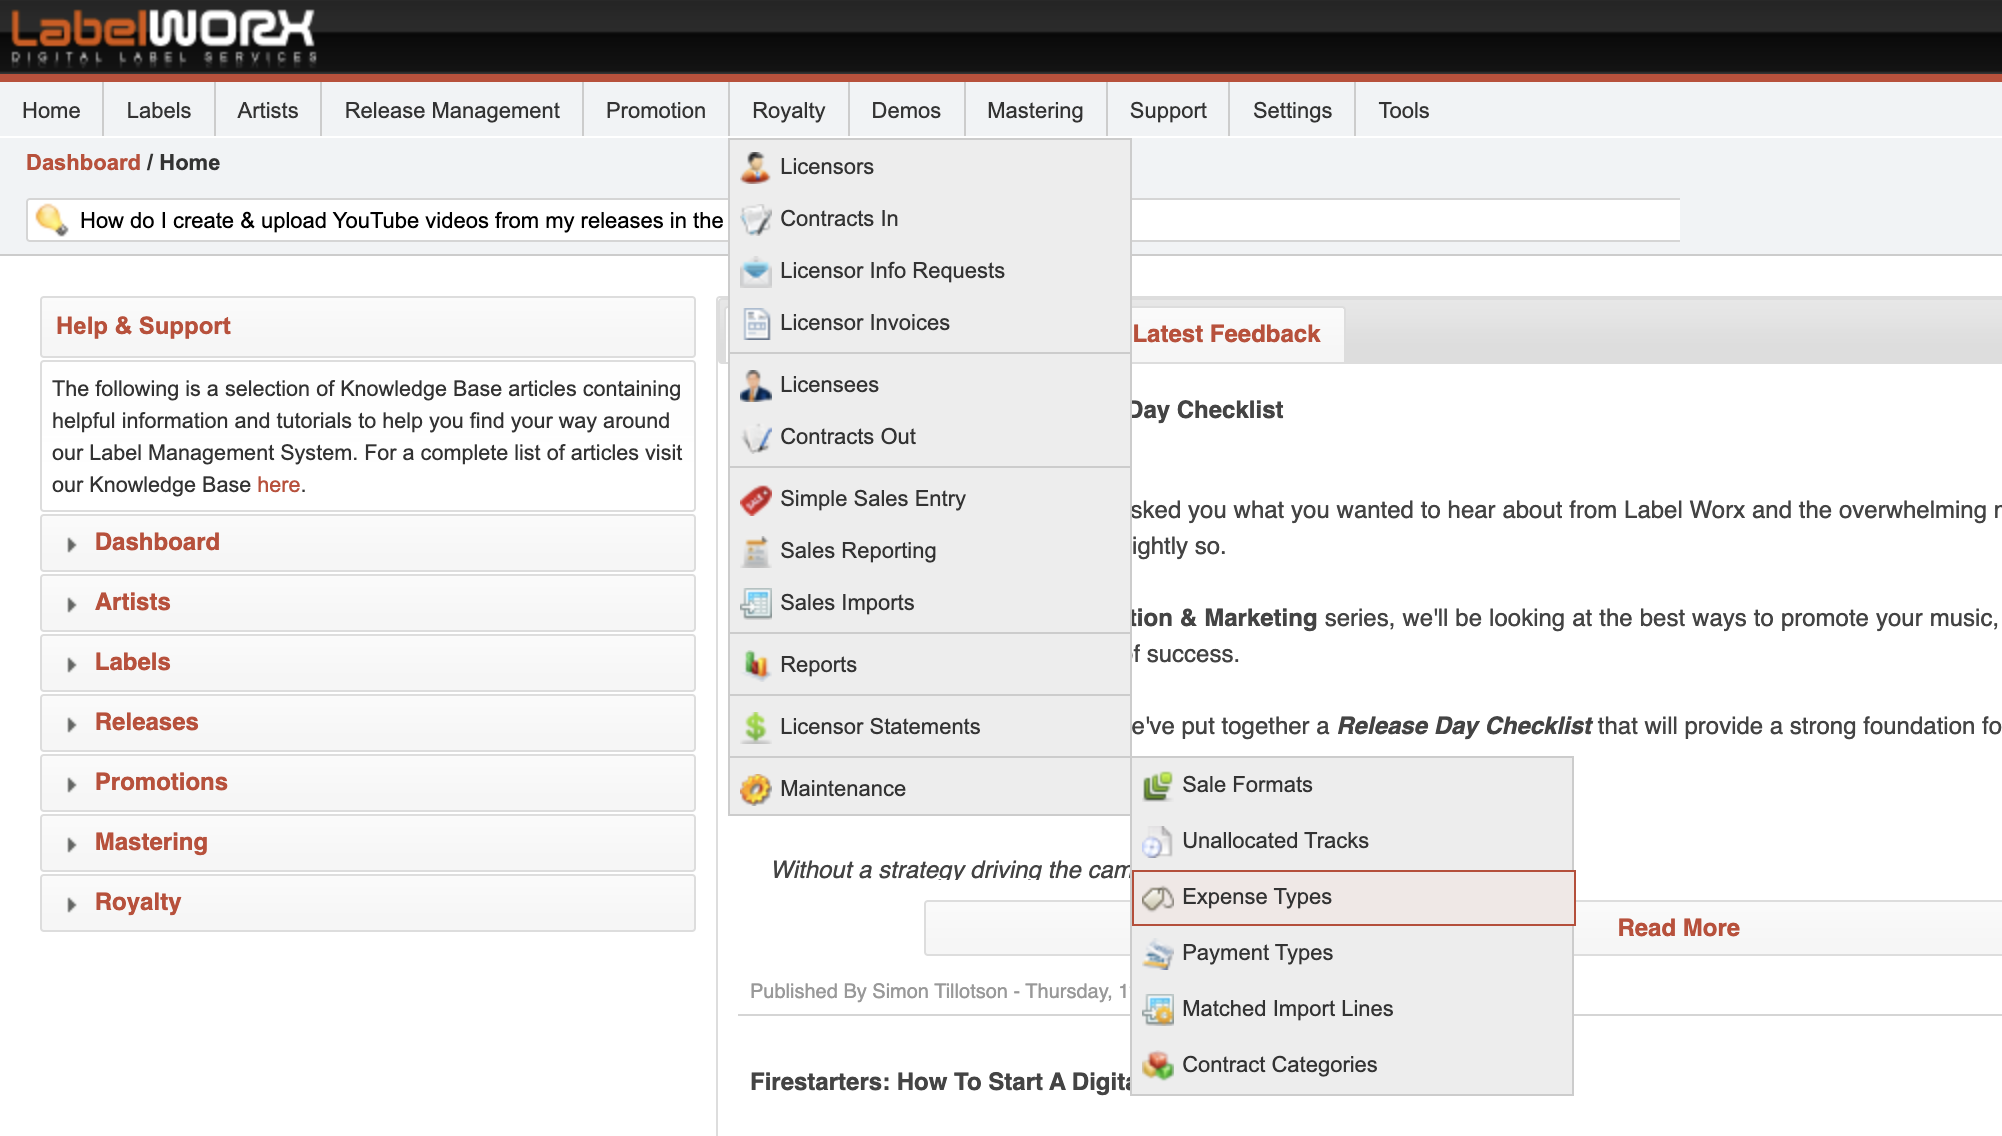
From the Label Worx Dashboard, select Royalty from the top menu. Then, select Maintenance and choose the Expense Types option.
This will then take you through to the Expense Types screen. Here, all of your Expense Types are stored. You should immediately see all of the default Expense Types. These should cover most standard expense types.
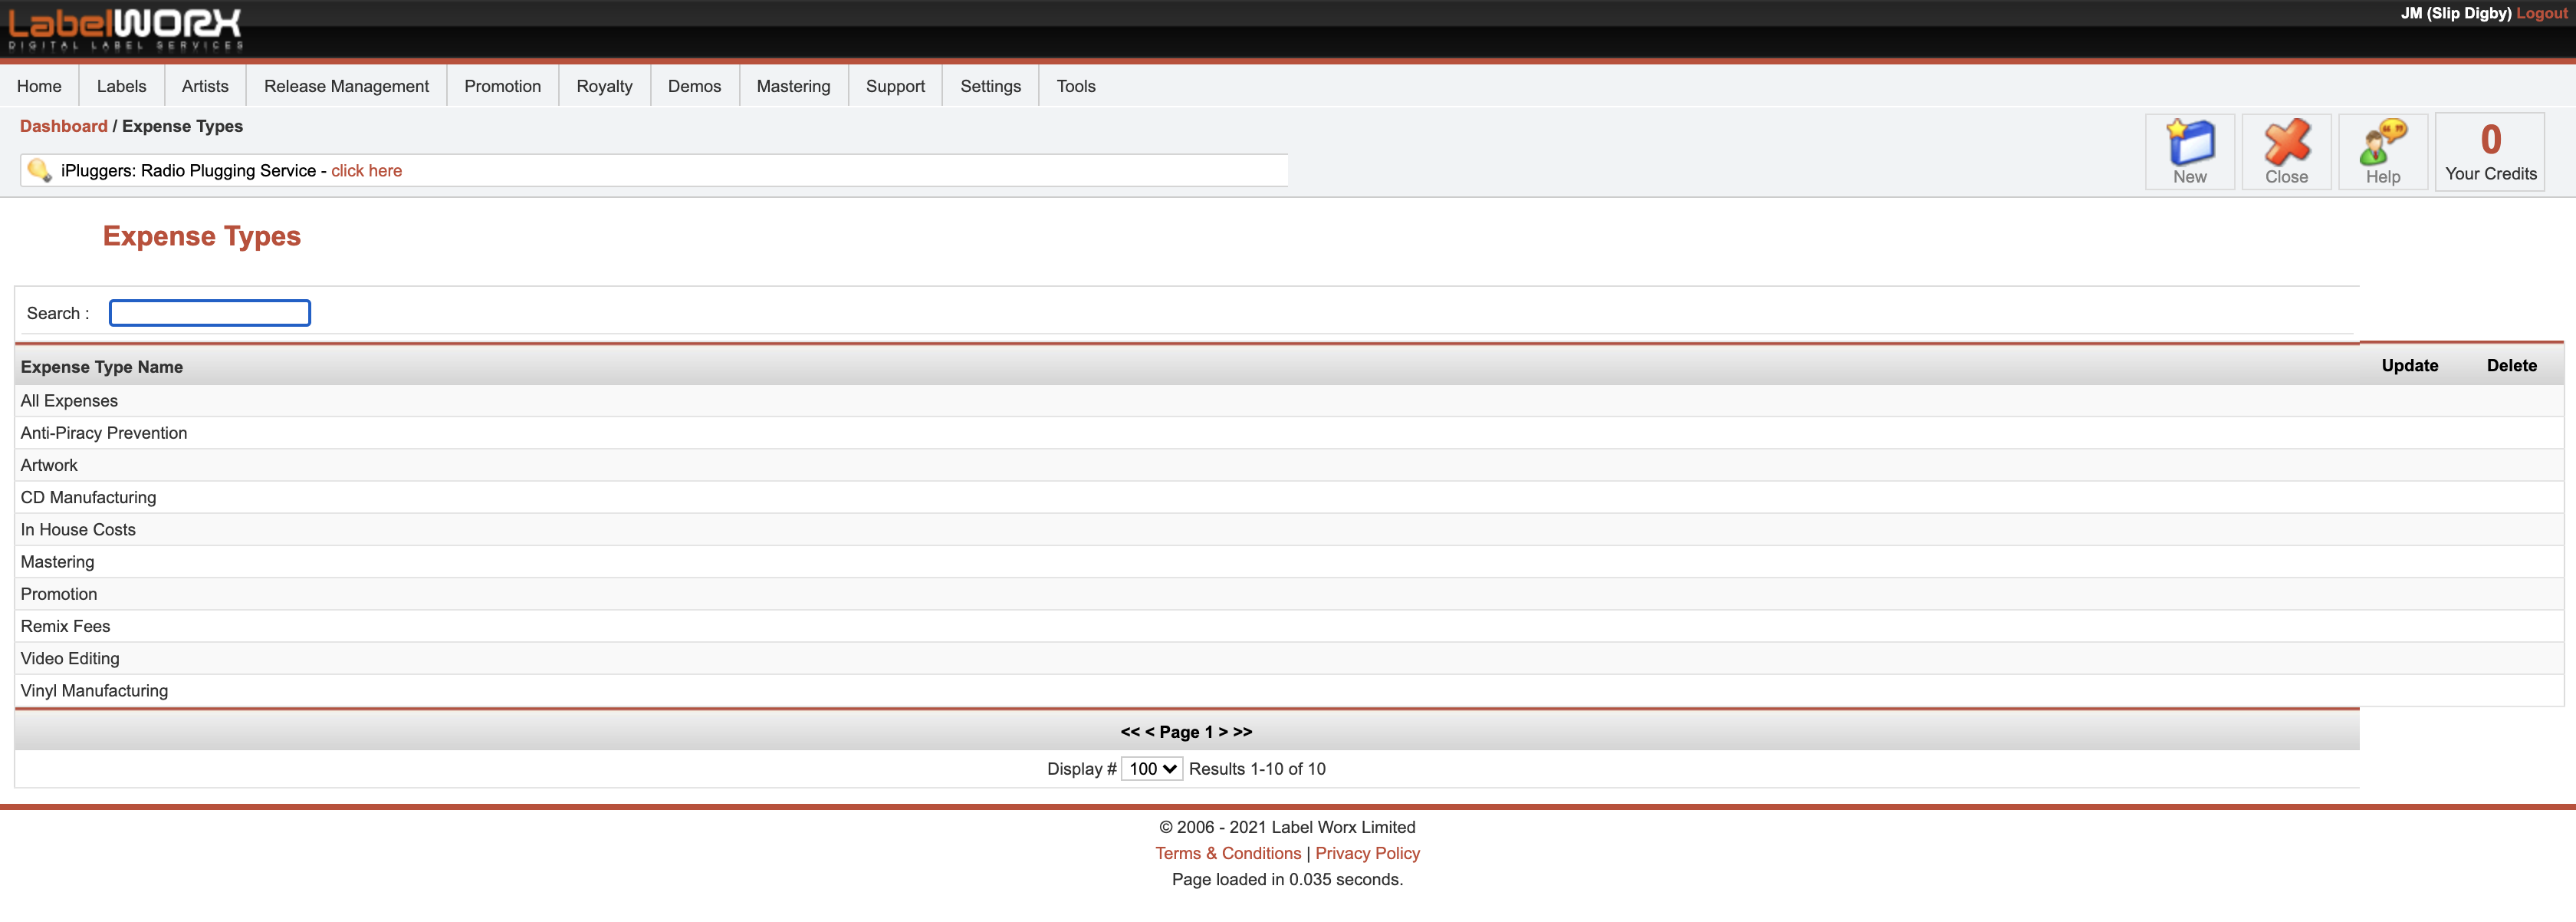
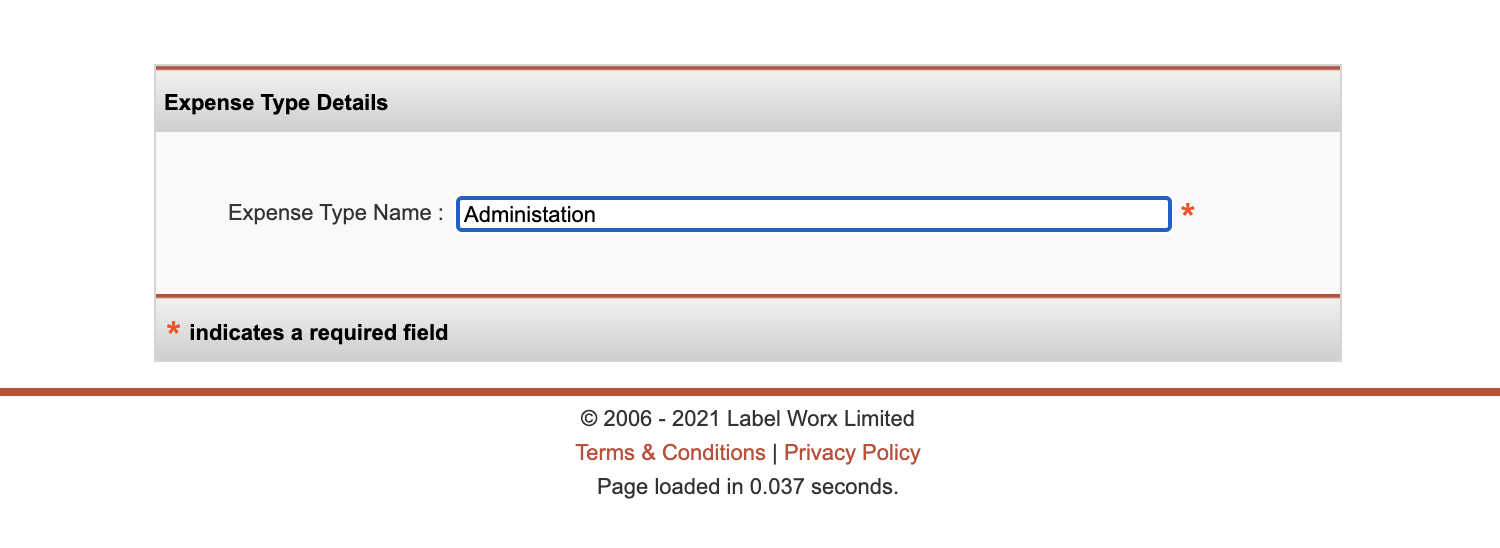
If you would like to add more, simply click the New button located on the icon menu. In the New Expense Type screen, you can enter your desired Expense Type name. This should be a descriptive word/category. Click the Save button in the icon menu to complete the process.
Now that you’ve added a new expense type to the system, you will be able to detail it on the Contract In for that track where required